Fission Serverless Function + Zapier Webhook - Automate your workflows
Categories:
There hasn’t been a greater need for automation than what it is today. Things around us are moving fast and everyone wants things done faster. Getting that agility manually is tough and hence individuals and teams globally look for ways to automate workflows.
In this post, I’m going to show you how you can automate your workflows using Fission serverless functions and Zapier Webhooks.
What is Zapier?
Zapier is one of the world’s most widely used tools to automate workflows. It allows you to integrate various apps that you use and integrate them along with actions to complete a flow.
For example, you want to track all the mentions on Twitter. You can create a ZAP, to trigger whenever someone mentions you. It will take the tweet and put it in a Google Sheet. All of this without you writing a single line of code!
PS: Do read how we created a Twitter Bot on Fission!
Apart from the various app integrations that Zapier provides, Webhooks are a popular way to get the most out of your applications. It’s probably the ultimate way to automate your workflow with Zapier. If you want to know how Webhooks differ from APIs, I suggest reading Webhook vs API - Which One Do You Need?

Fission Serverless Function + Zapier Webhook - The Use Case
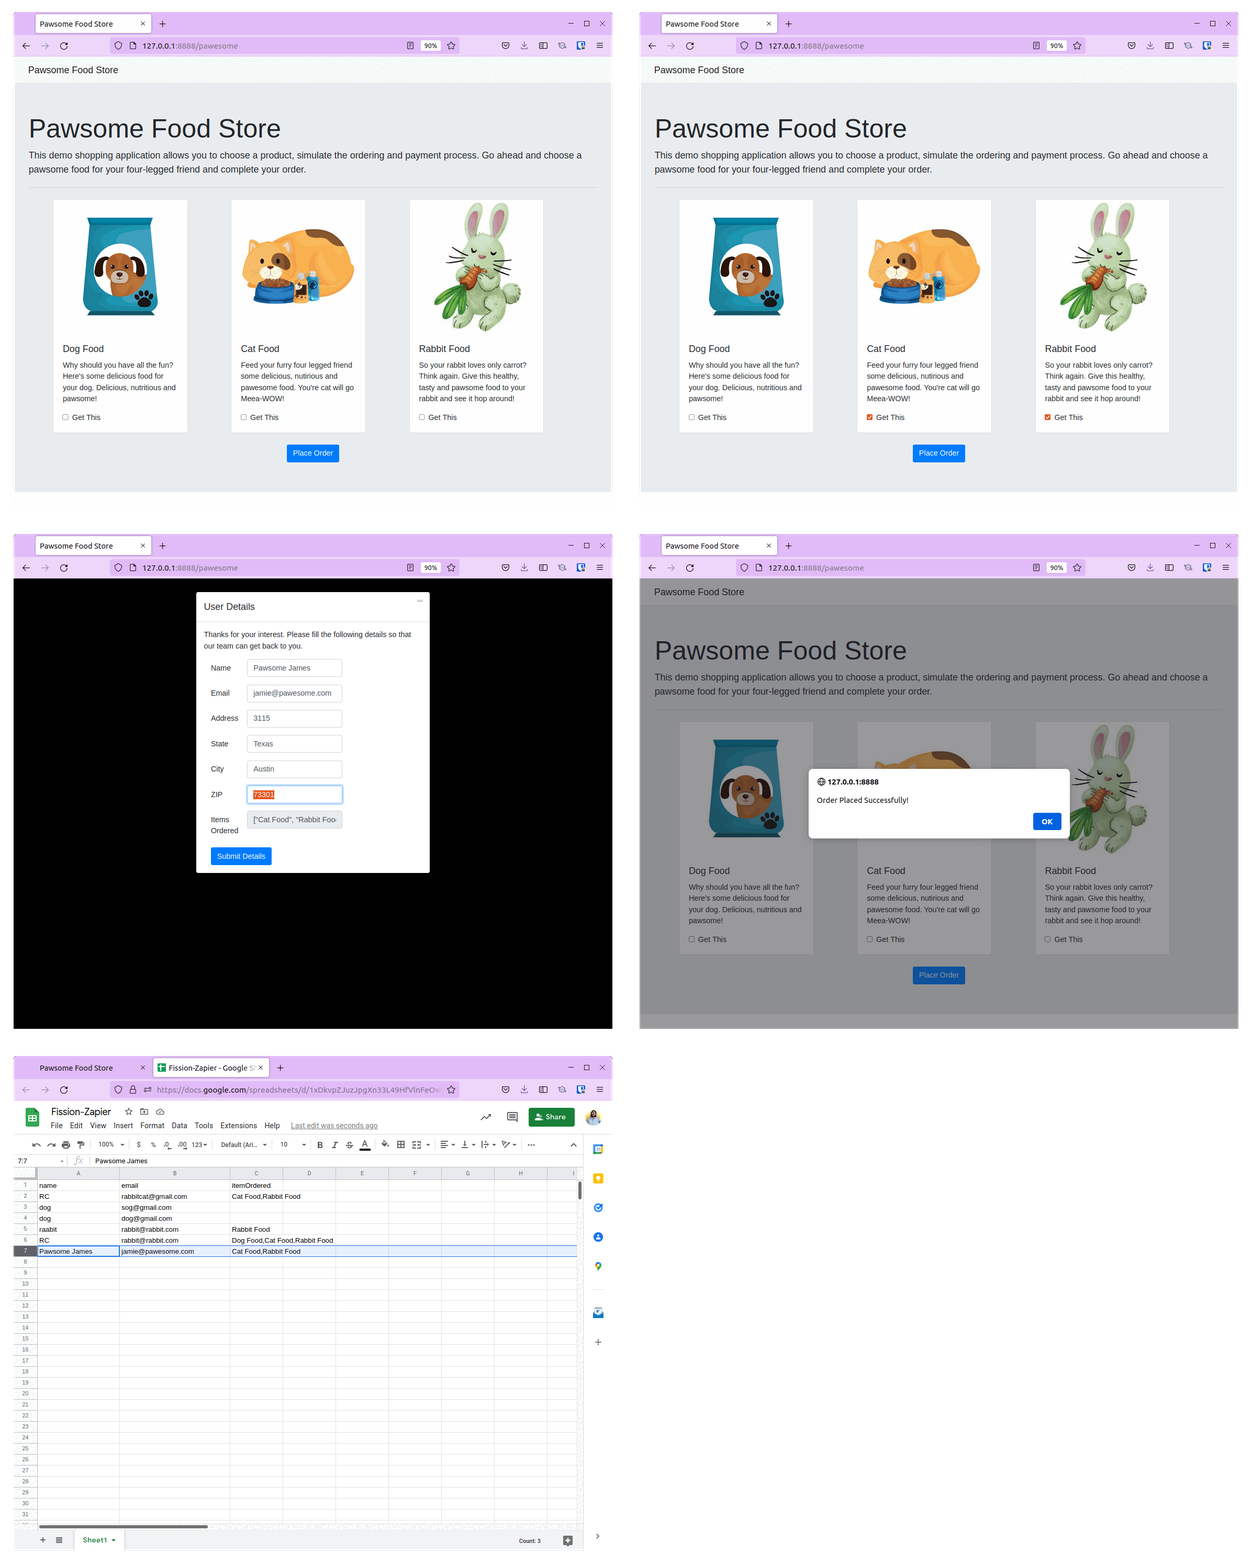
The use case is of a pet food online store called Pawesome. The user chooses products they wish to purchase and places an order. They fill a form to complete the order. Details of this form are sent to a Zapier webhook.
At the Zapier end, we’ve created a Zap to dump the data to a Google Sheet. The webhook receives the data sent from our application and dumps it in a Google Sheet.
This as you see is a very simple use case of using Fission Serverless Function with Zapier Webhook. You can in fact make any change to the workflow or create an entirely new use case.
The application is developed in Python using Flask Web Framework.
Pre requisites
There are three things that you need to have this application working.
- Fission
- Google Account
- Zapier Starter Account - the basic Free account doesn’t provide Webhook integration, however you can use their 14-day trial.
Fission
Fission as you might know is an Open source serverless framework that runs on top of Kubernetes. Since the application is deployed as a Fission function, you must have Fission installed in your Kubernetes cluster. You can refer to our Fission Installation guide for more.
Google Sheet Setup
Before we start with creating the Zap, we need to create a Google Sheet with the required fields
- Log in to your Google Sheets/Drive account
- Create blank spreadsheet
- In the top row, add the following headers:
- name
- itemOrdered
- Save the spreadsheet with some name
Creating a Zap
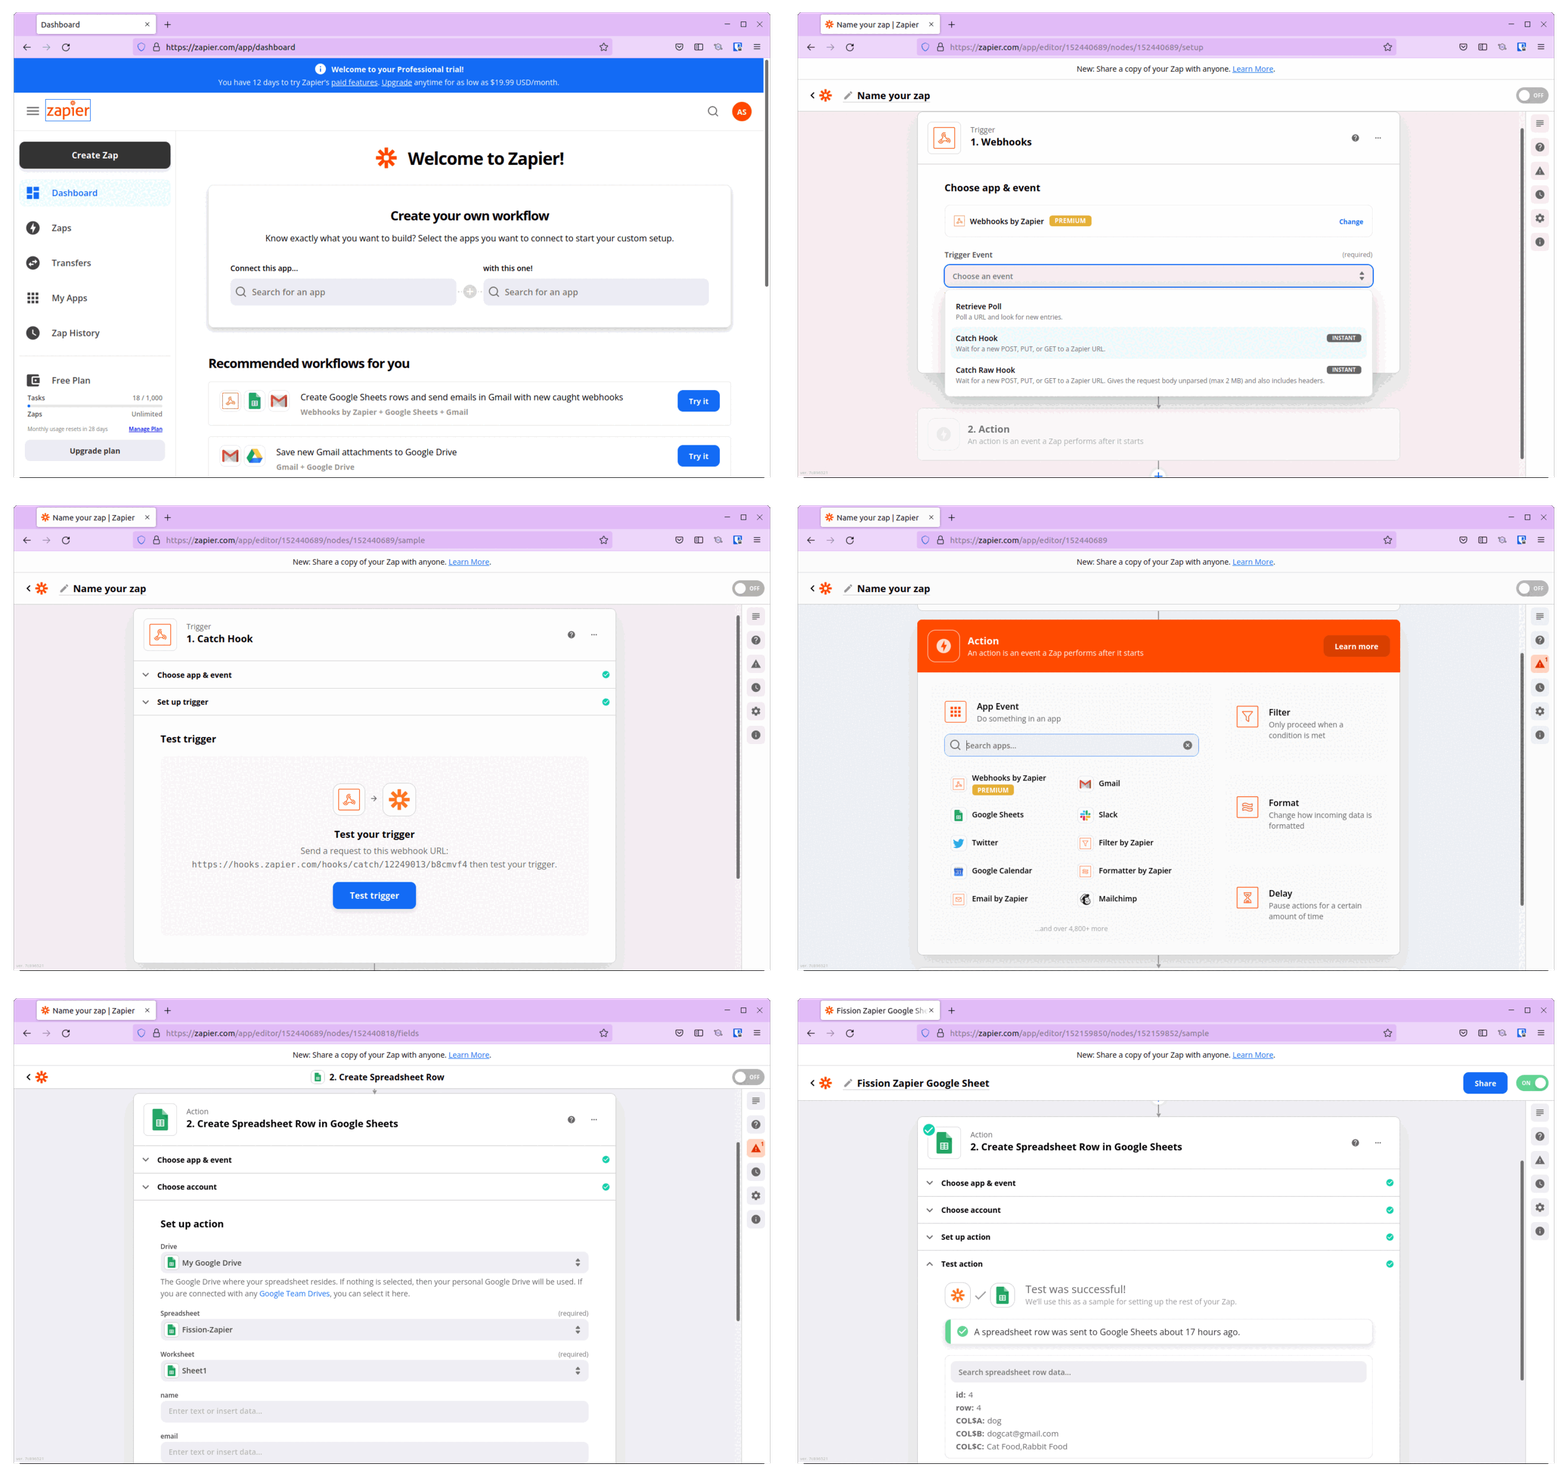
We will first start by creating a Zapier Webhook and a Zap before working on the application. To do that, follow these steps:
- Sign In to your Zapier Account.
- Click Create Zap button on top left to create a Zap
- Choose Webhook from Triggers and select Catch Hook at Trigger Event
- At this point, you will have the Zapier Webhook URL
- In the next step, test the Webhook url by sending dummy data to it, you should see Zapier showing the data that you sent it
- Next, we create an Action that will be performed after the event is triggered
- Select Google Sheets from App Event options & select Create Spreadsheet Row
- Pick your Google Account - the same one where you created the spreadsheet. It will ask you to allow Zapier to access Google Drive. You need to allow it for this integration to work
- From the dropdown menu, select the spreadsheet you created earlier and choose a worksheet
- Zapier will automatically populate the option based on the row headers provided
- At this point we need the actual data to validate and create the Zap, you can pause here and proceed with the example to generate data, comeback and verify
- Once the verification is complete, the trigger is created. Give your Zap a name and activate it

Application Setup & Deployment
Clone the Pawesome Repo to your local system to begin setting up the application.
Setting up Secret
We will make use of Kubernetes Secrets to store and access the webhook_url.
Start by encoding the webhook_url that you got after creating the Zap
echo -n 'actual-webhook-url' | base64
EncodedWebhookUrl
Create a new secret.yaml file and add the encoded string as data. We would be accessing these secrets from our code. Refer to our documentation on accessing secrets in Fission from code.
apiVersion: v1
kind: Secret
metadata:
  namespace: default
  name: secret
data:
  webhook_url: EncodedWebhookUrl
type: Opaque
Create a Python environment
fission environment create --name python --image ghcr.io/fission/python-env --builder ghcr.io/fission/python-builder
Create a zip archive as sample.zip archive by executing package.sh script
./package.sh
Create a Package
fission package create --name fissionzapier-pkg --sourcearchive sample.zip --env python
Create the pawesome fission function
fission fn create --name pawesome --pkg fissionzapier-pkg --entrypoint "main.main" --secret secret
Create a route
fission route create --name pawesome --method POST --method GET --prefix /pawesome --function pawesome
Executing & Running Pawesome
Port forward the service to access it from browser
kubectl port-forward svc/router 8888:80 -nfission
Navigate to http://127.0.0.1:8888/pawesome to access the application. Choose any product and click on Place Order. In the dialog box, enter your name and email id rest can be ignored and click on Submit. You should see Order Placed Successfully dialog box. Open the Google Sheet that you had created, you should see a new row added with the name, email id and itemOrdered.

With this you have successfully automated a simple workflow using Fission serverless function and Zapier webhook. You can choose any Action and Trigger to create better useful workflows for your use case.
Conclusion
That’s about it for this post. With this, you now know how to integrate Zapier Webhook with Fission serverless functions. You can infact extend this use case to integrate with your CRM to track leads. This way you can focus more on the actual work rather than integrating various applications that you work with.
In case you still have any questions, feel free to reach out to us. We would be happy to help.
Want more?
More examples can be found in our examples directory on GitHub. Follow Fission on Twitter for more updates!
Author:
Atulpriya Sharma | Developer Advocate - InfraCloud Technologies